Downloads
Guides on how to run Zoom in VC-enabled Classrooms
- Step by Step Guide for Classroom with USB connection for Camera & Microphone System (PDF)
- Step by Step Guide for Classroom with Full Fledged Video Conference System [PDF]
- Zoom Instructor Quick Guide V1.1 [PDF]
- How to Activate your SMU Zoom Account [PDF]
- Logging in to your SMU Zoom Account via SSO (Single Sign On) [PDF]
- User Guide for Live Streaming & video recording of lesson on Zoom in Classrooms which are not equipped with VC or video recording systems [PDF]
Operating Guides for AV equipment in Classrooms
- General Guide for usage of AV equipment in LKCSB, SOA, SCIS, SoE/SCIS2 and Admin Building) [PPT]
- General Guide for usage of AV equipment in Yong Pung How School of Law (SOL) [PPT]
- General Guide for usage of AV equipment in SMU Connexion (SMUC) [PPT]
- General Guide for usage of AV equipment in Psychology Lab in SoSS/CIS Building [Link]
- User Guide on how to do wireless Projection from Laptop in Seminar rooms, Classrooms & selected Meeting rooms
Faculty and students would need to install the Kramer VIA app and CLEARPASS on their laptop to do wireless projection onto the screen
Download links for the app for Windows and Mac OS are listed below
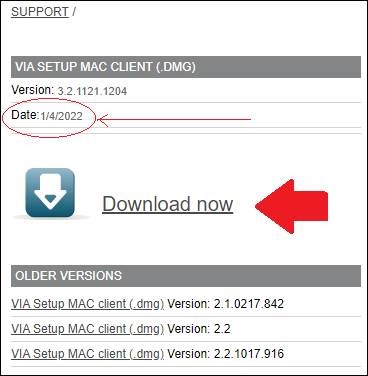
Mac O/S - https://k.kramerav.com/support/download.asp?f=60055
Windows - https://k.kramerav.com/support/download.asp?f=60057
Please remember to download the latest version and not the older versions.
You can refer to the date of the release.
ClearPass app - Download
- Mediacast Quick Guide V1 [DOC]
- LG e-WhiteBoard User Guide (SCIS Computer Lab 3) [PDF]
- Classroom video recording guide [PDF]
- How to publish your classroom recording videos in e-Learn platform [PDF]
- How to project teaching materials from Apple iPad [PDF]
- Live streaming page [Link]
- Back To Campus - Enabling a smooth digital transition [Link]
- Zoom Room Guide [Link]
Quick Overview on how to do projection in Classroom from your Laptop
All audio/Visual equipment in the classroom are controlled via the Touch Panel located behind the Lectern Table and in-between the Projector Screens

If the screen is in standby mode
Touch anywhere on the screen to trigger the control menu.
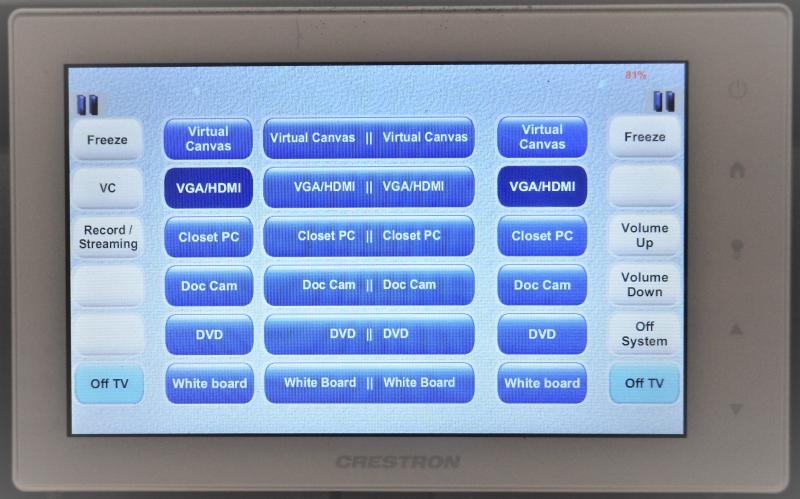
The Touch Panel will display a list of input selections
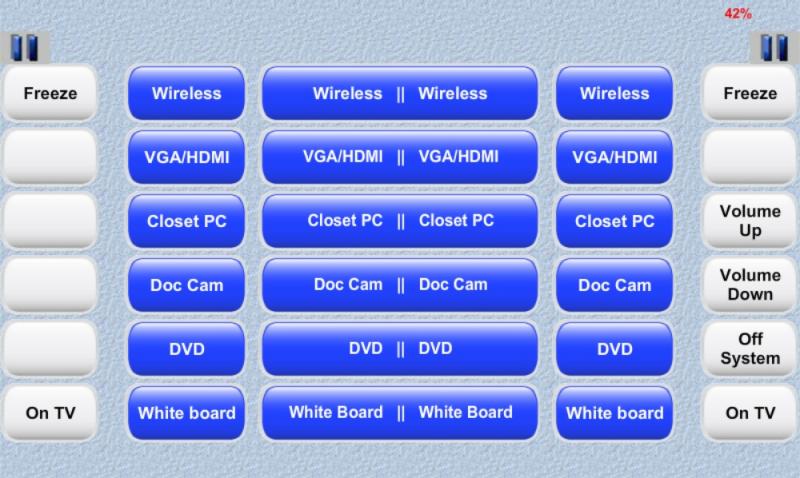
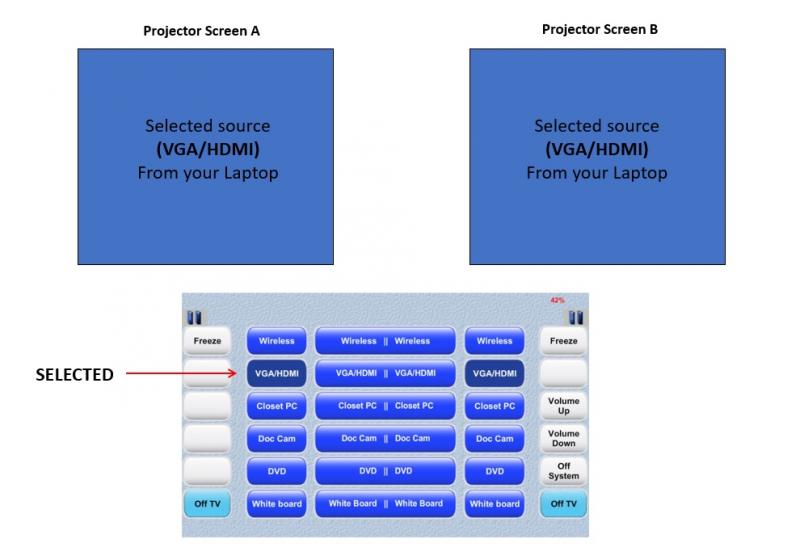
To do projection from your laptop onto both screens
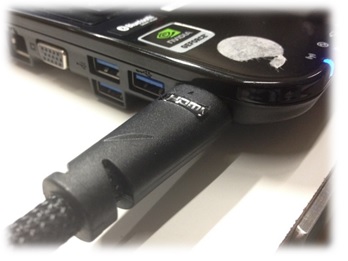
- Connect the HDMI cable to your Laptop HDMI port
Press the center button labeled <VGA/HDMI || VGA/HDMI>
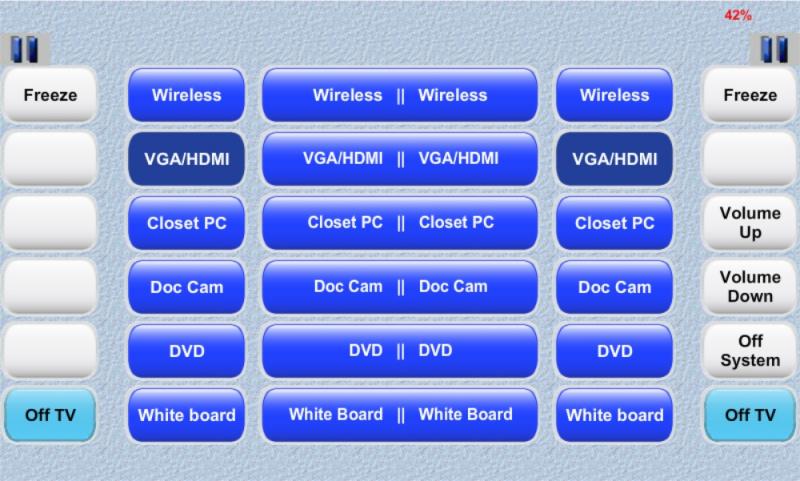
the 2 buttons on the sides will be highlighted in dark blue to indicate your selection made
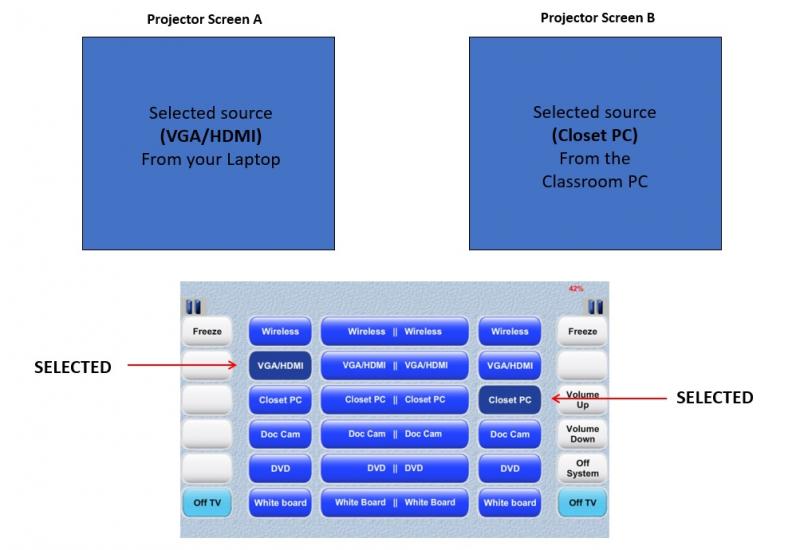
To project 2 different input sources
i.e left side display laptop and right side display Classroom PC
- Press the <VGA/HDMI > button on the left side
- Press the <Closet PC> button on the right side
For usage on other Audio/Visual equipment available in the classroom, please refer to the operating guides at the top of the page.
Switching off the projection system
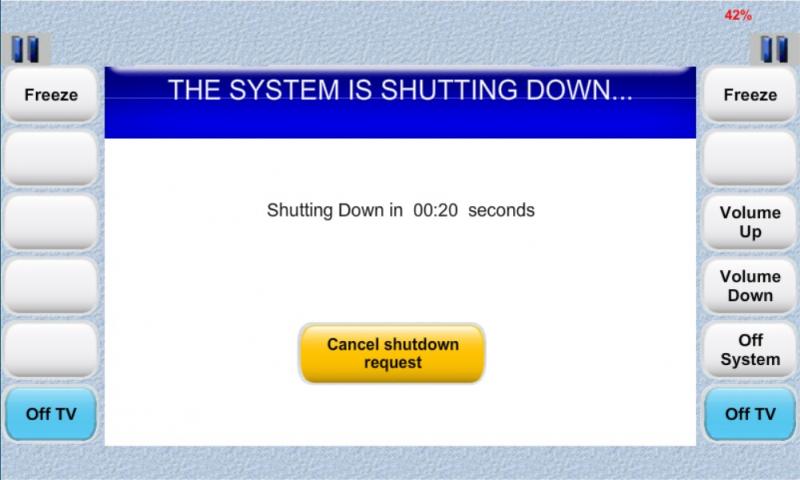
At the end of your class, please kindly switch off the projection system
- Press the OFF button
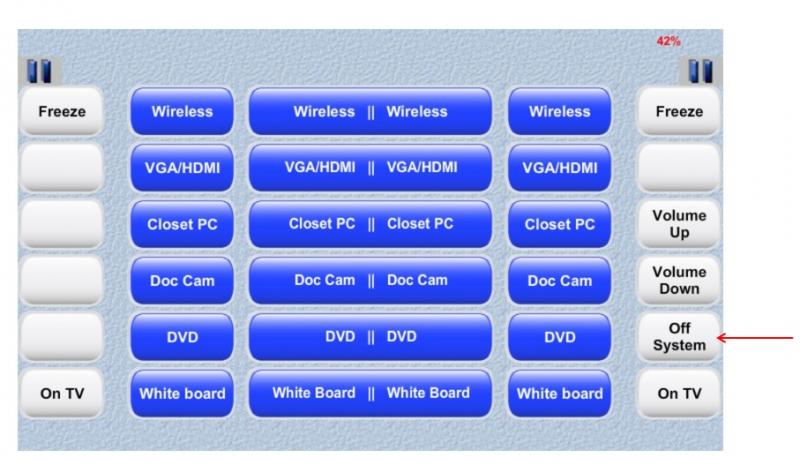
- A countdown of 20 secs will start before system is being shut down, you may leave the room
- You can press the CANCEL button to stop the shut down process
